Adobe Podcast
Adobe Podcast is a web-based tool that lets you easily record, edit, and publish audio content. It’s useful for creating engaging podcast-style learning materials. Some good use cases in your module could include:
- Weekly topic overviews
- Guest interviews with experts
- Revision summaries
These are accessible learning activities that allow students to learn flexibly and on the go.
With AI-powered tools like automatic transcription and noise reduction, Adobe Podcast makes it easy to produce clear, accessible audio without needing advanced technical skills. This page gives you a quick overview of how to get started making audio content to support your teaching. Before you start to explore Adobe Podcast, you will need to do the following:
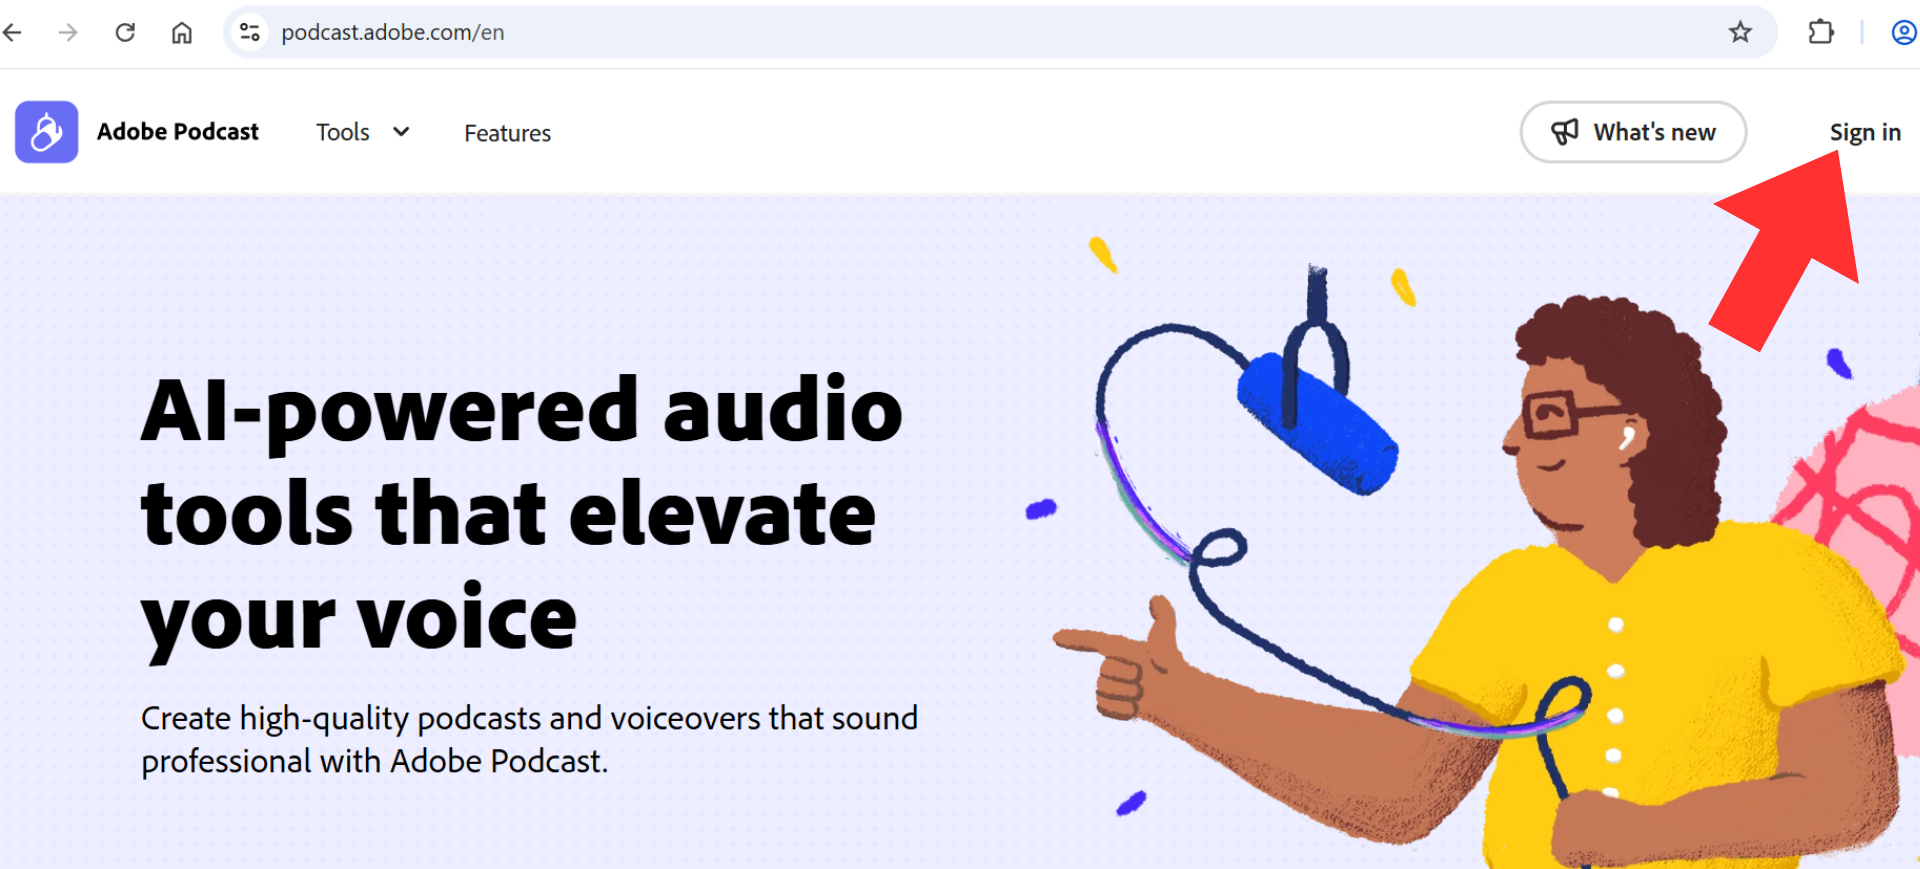
- Open Adobe Podcast in Google Chrome. This is the browser currently recommended by Adobe.
- Sign in on the top right using your TU Dublin credentials.
Now follow the next steps to get started.
Before you begin, Adobe Podcast can help you make sure your microphone is working properly. A USB microphone, a Bluetooth microphone, or a headset with a microphone will always improve your results.
Steps:
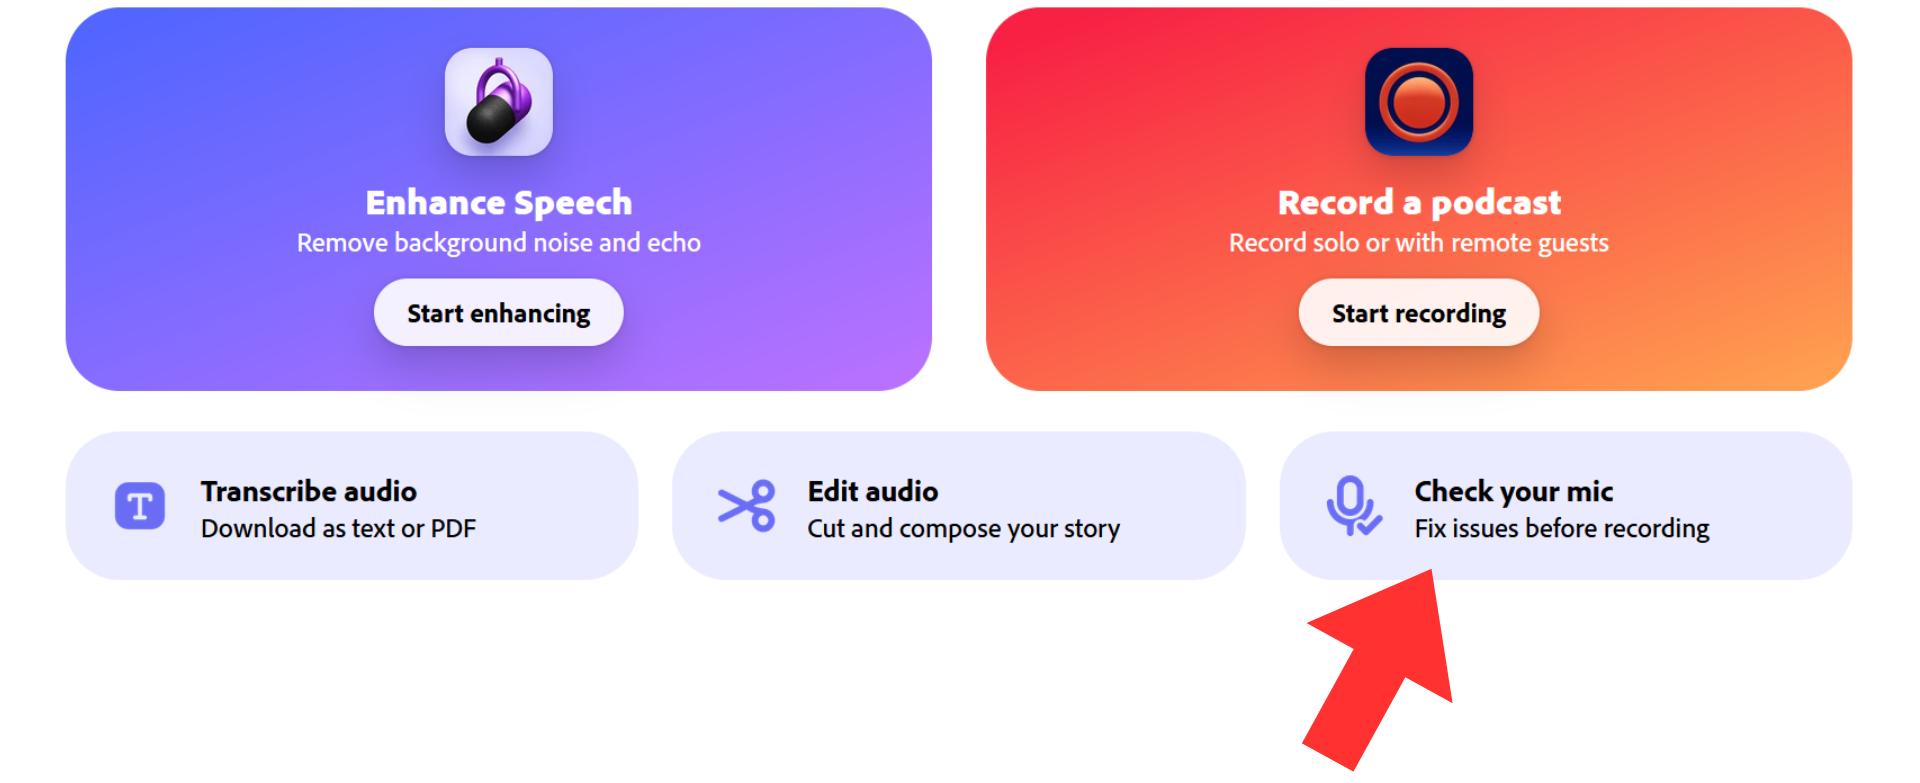
1. Select ‘Check your mic’ in the menu.
2. Speak at a normal level into your mic for about 10 seconds - introduce yourself for example. Adobe will assess the recording for clarity and background noise.
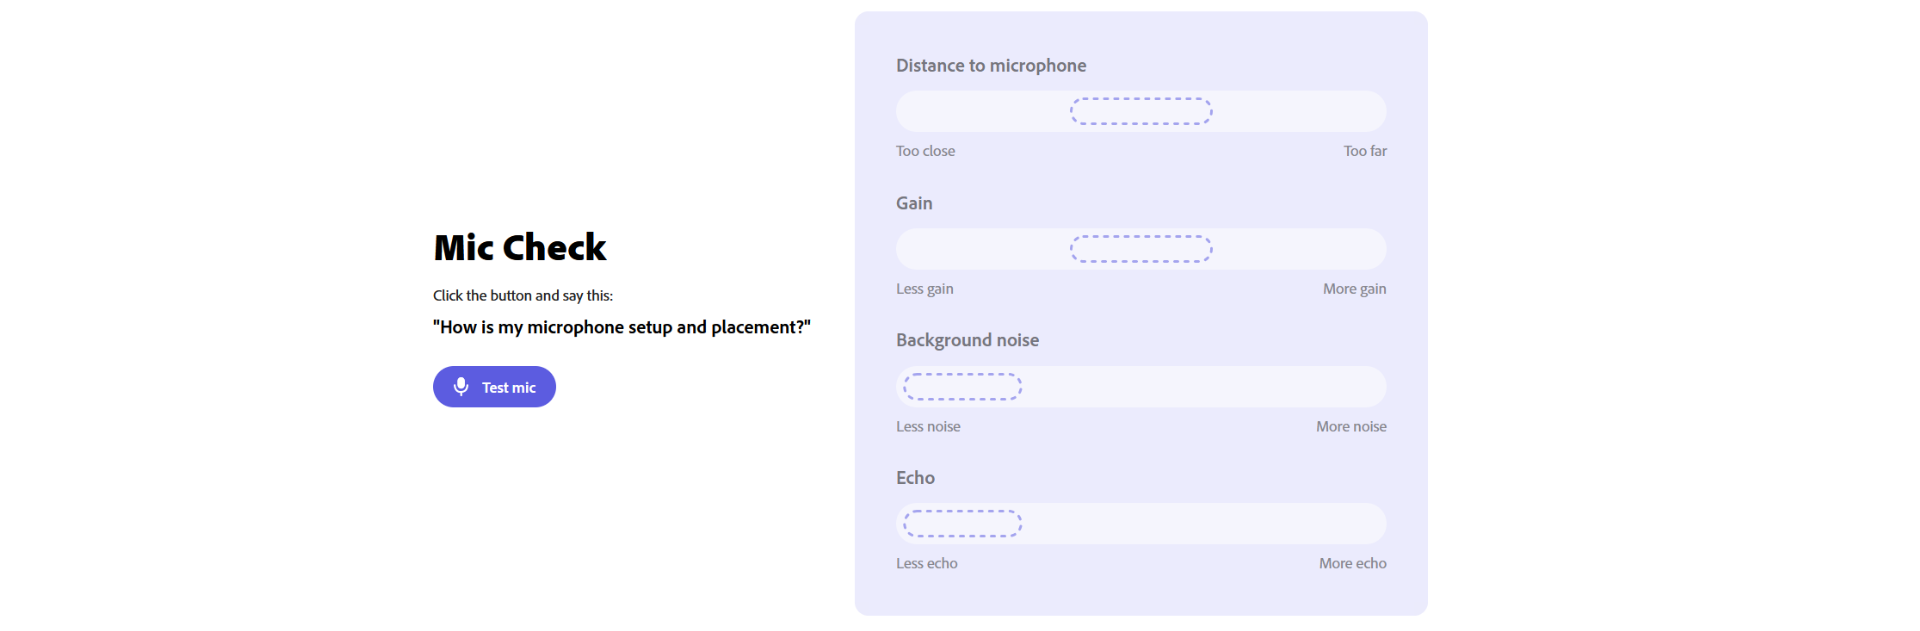
4. Next follow any guidance that is provided (e.g. reduce noise, reposition mic).
5. Retest until your audio passes with good quality.
It is recommended that you always use a pre-prepared script for recording your podcast content.
This will help to structure the content in advance, keep you on track while recording, and manage the duration of the recording. It will also reduce the need for editing (although later we will see that editing in Adobe Podcast is very straightforward).
When you're ready to record your own audio, you can follow these steps:
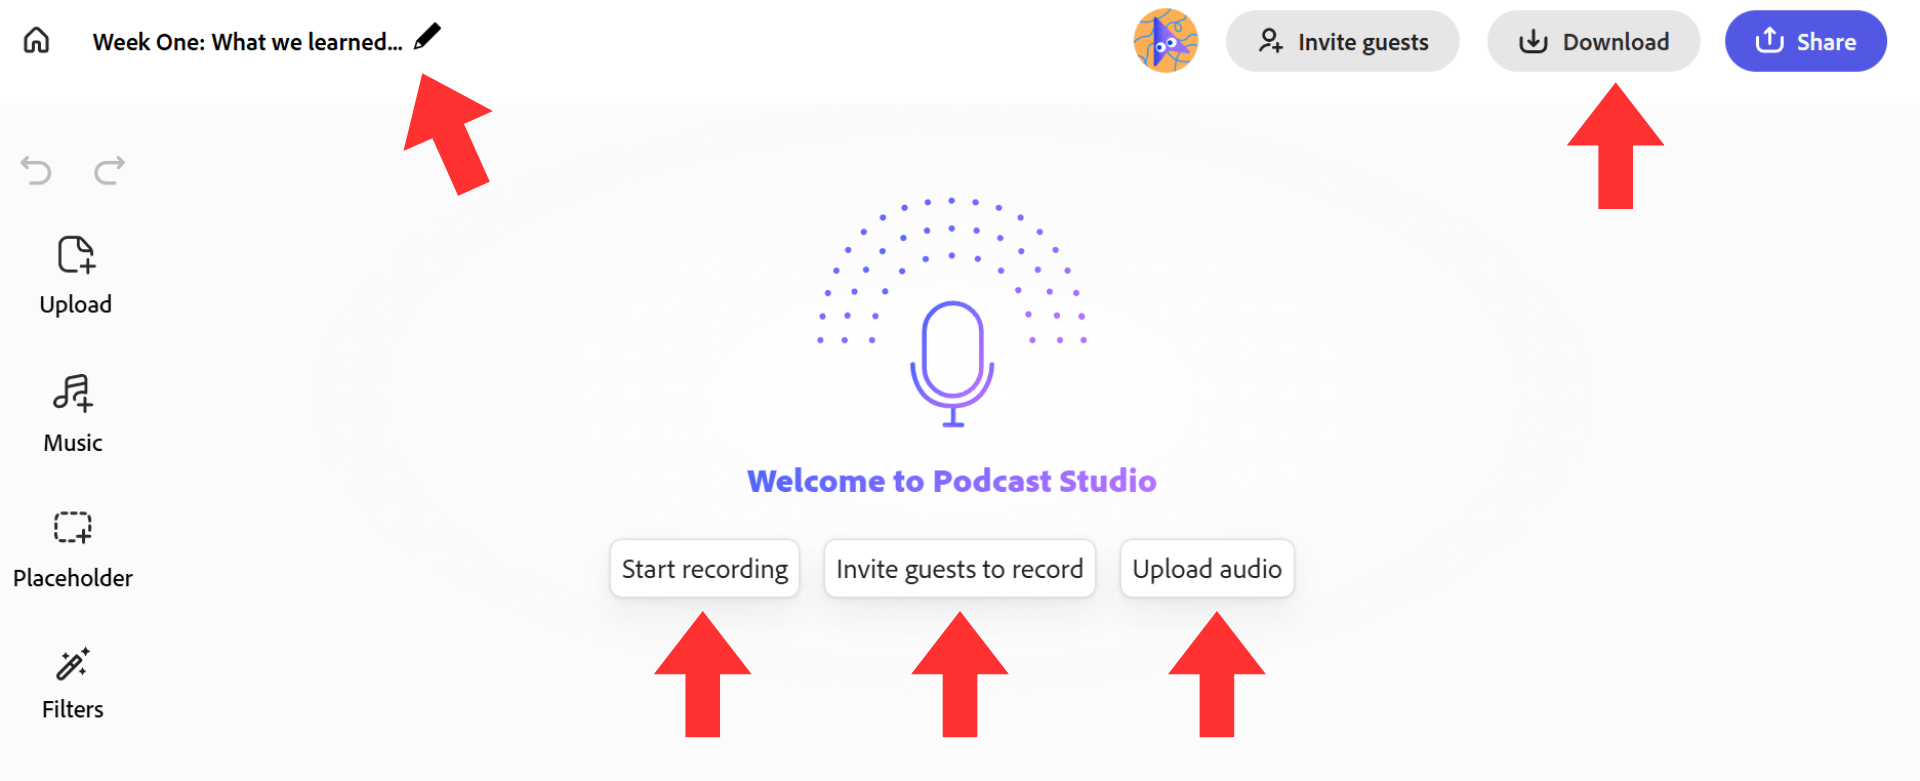
1. On the main page, select ‘New Project’ and you will see the interface above.
2. On the top left, use the pencil icon to name your project.
3. You now have the option to ‘Start Recording’, ‘Invite Guests’ and ‘Upload Audio’.
4. In this instance, you will choose the option to ‘Start Recording’ and you will see a recording toolbar on the bottom of the screen.

5. Press the red record button and begin speaking.
6. Stop recording when finished - your audio is automatically saved.
7. A full transcript will appear instantly below the audio timeline.
You can also upload an existing audio file if you have recorded elsewhere.
One of the better features of Adobe Podcast is the Invite Guests function, which makes it easy to record high-quality, remote conversations.
Bringing in guest speakers like colleagues, alumni, external experts or students can add great variety and real-world insight to your audio content.
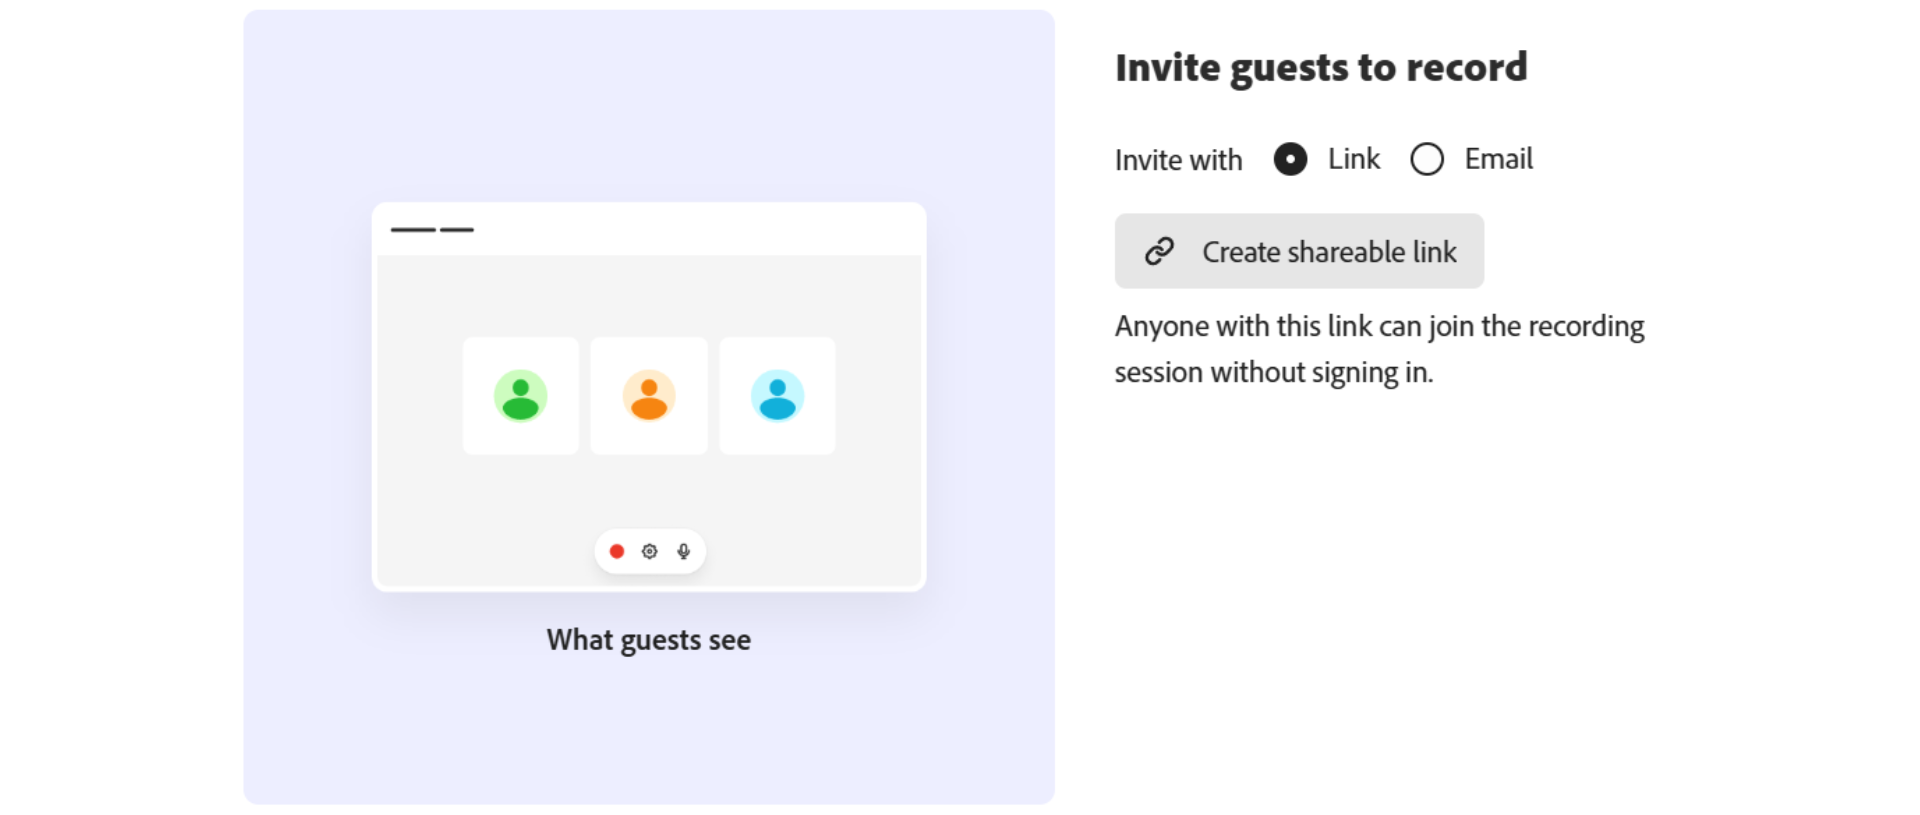
How to Invite a Guest in Adobe Podcast Studio:
1. Go to the main page and select ‘New Project’.
2. Give your project a name (e.g. ‘Week 5 – Guest Interview with Jane Smith, Nobel Prize Winner’).
3. Select ‘Invite Guests’ and copy the link to share with your guest.
Guests don’t need an Adobe account; they can join from a browser - ideally though, they should be directed to use Google Chrome. It’s a good idea to schedule your guest 5-10 minutes before recording for a relaxed tech check and informal chat. This will help your guest to feel comfortable and ready for a smooth recording.
4. When your guest joins, you’ll see their name appear in the session.
This gives you a chance to:
- Do a quick mic and audio check
- Brief your guest
- Make sure everything sounds right on both ends
5. Once you're both ready, you - as the host - click the red Record button to begin.
- Adobe will record each participant’s audio locally on their device for maximum quality.
- After the session ends, the platform automatically processes and transcribes all audio files, ready for editing.
Adobe Podcast allows you to edit audio – not by editing waveforms as with traditional audio editing models, but rather by using text edits. Whether you record within the browser-based interface itself or upload an audio file you have generated or sourced elsewhere, Adobe Podcast will generate a transcript of that audio, and the text of the transcript is what you will edit. The audio will then update to match the text. Let’s see how this works:
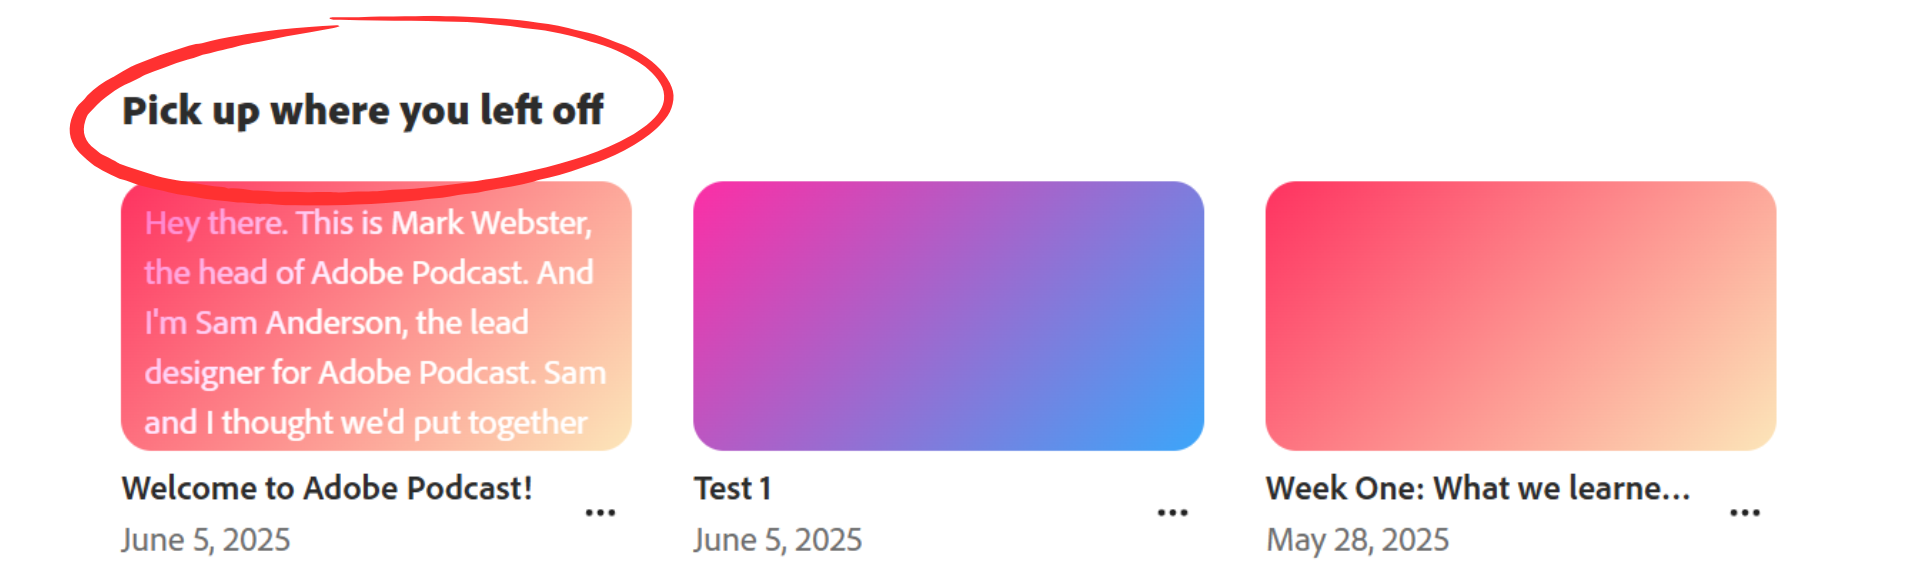
1. To edit an existing project, select that project on the main page under the heading ‘Pick up where you left off’
2. Alternatively, you can work on a current project right after you have recorded it - you will be in the editing environment already.
3. Review the auto-generated transcript of what you have previously recorded, just recorded, or that of an audio file you have uploaded.
4. To remove a mistake or words that you don’t want, simply delete the text - the audio should update to match your edits.
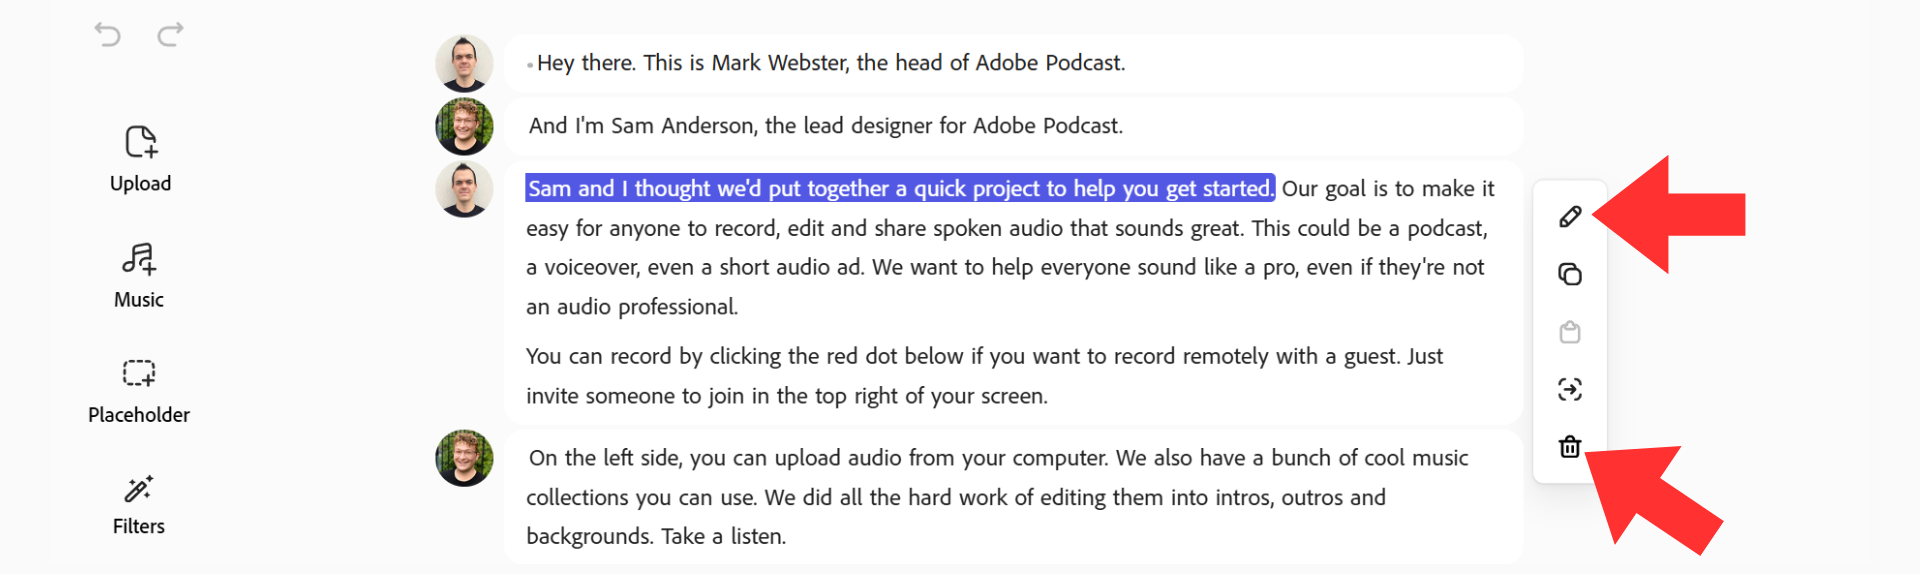
5. Alternatively, you can use the pencil icon in this editing menu to add or change text in the transcript window. Adobe Podcast will attempt to generate audio using AI to match voice data from the recording. This is a relatively early iteration of the tool, so only use it for very specific reasons, e.g. fixing significant mistakes.
6. When you see a small dot in the transcript, it signifies a gap in audio or a silence. The dot can be deleted to remove a pause or hesitation.

7. Use the playback controls to preview changes and refine your edits.
8. Advanced users can add music here, either as background throughout, or as intro and outro. Experiment! It’s the best way to explore this feature.
As with the editing function, you can use the ‘Enhance Speech’ feature to improve audio that you have recorded in the Adobe Podcast interface, or that of an audio file you have recorded separately and uploaded.
In your project, toggle ‘Enhance Speech’ to apply:
- Background noise removal
- Audio levelling
- Voice clarity improvements
To enhance a separate audio file:

1. Click the ‘Enhance Speech’ tool
2. Upload your audio file (MP3/WAV)
3. Download the enhanced version for use in your project. Note that Adobe Podcast will not create a library within the browser of your enhanced files – projects will save, but individual files will not. Best practice is to download any audio files you have enhanced and upload them to an existing or new project.
You can compare the enhanced version to the original using the toggle option. Results are usually very good but trust your own ears. If it sounds odd to you, adjust the parameters to achieve good-sounding audio.
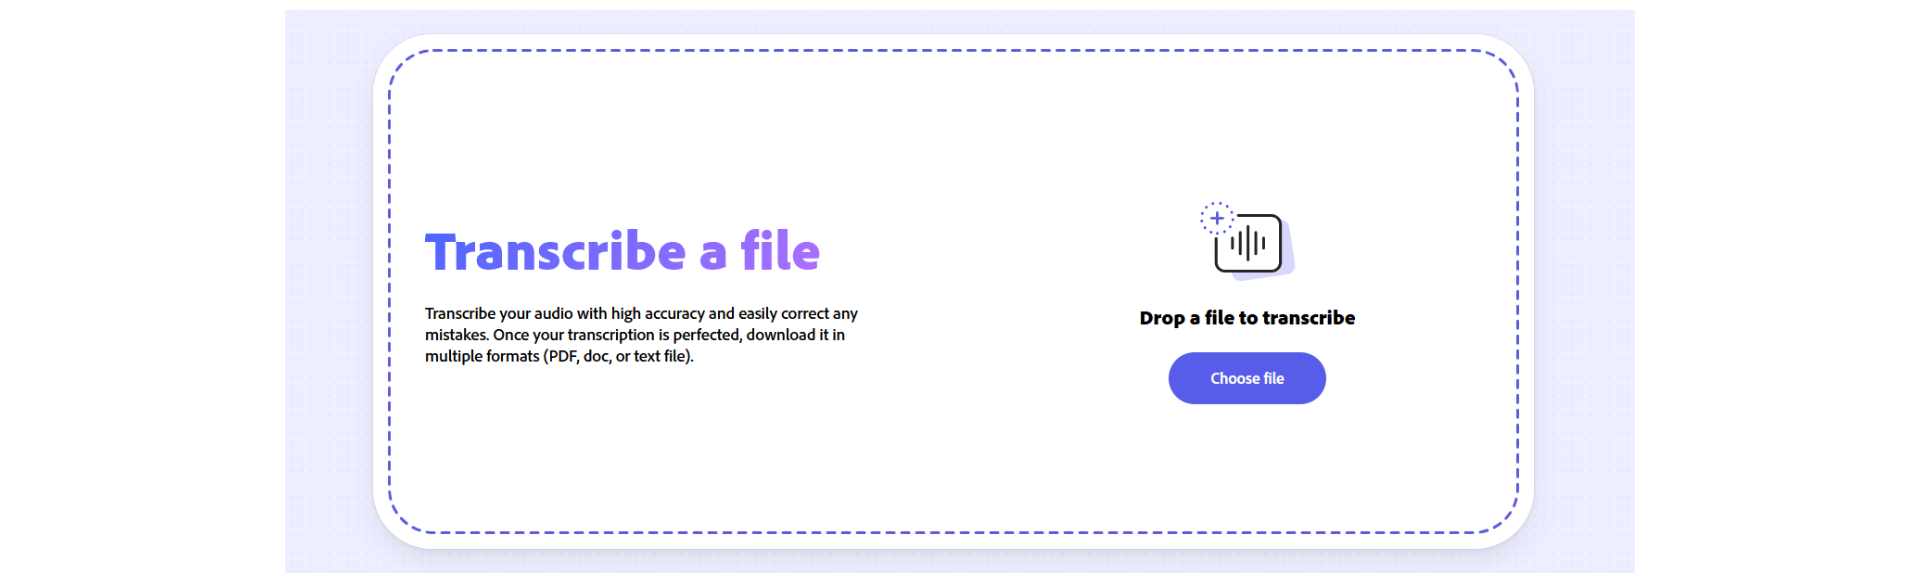
Adobe Podcast makes it easy to generate clean, editable transcripts from audio files you already have, which is perfect for making legacy recordings more accessible and for updates.
How It Works
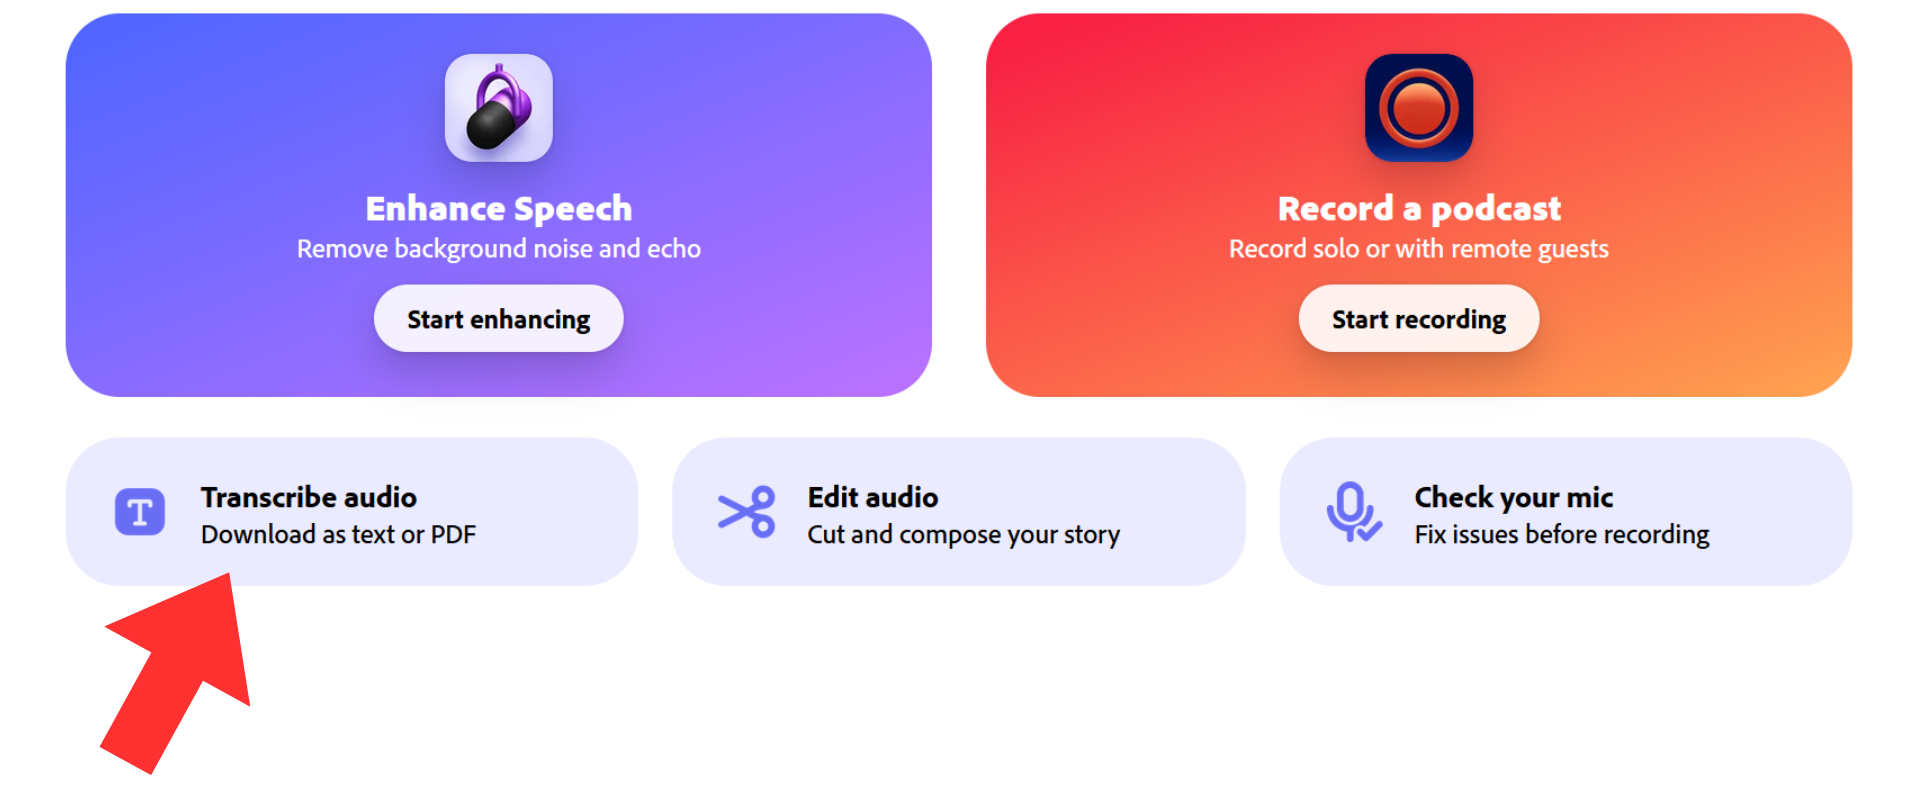
1. On the main page, select 'Transcribe Audio'.
2. Upload an existing MP3 or WAV file. Adobe will automatically generate a full transcript.
3. Edit the transcript:
Refine the transcript by correcting terminology, removing filler words, or trimming content. The edits to the transcript will update the audio as well.
4. Download and share:
Export the transcript as a text or Word file, to upload alongside your audio in the LMS, or to distribute as standalone text content.
Once your edited/enhanced recording is ready, you can download a finished project to share with students.
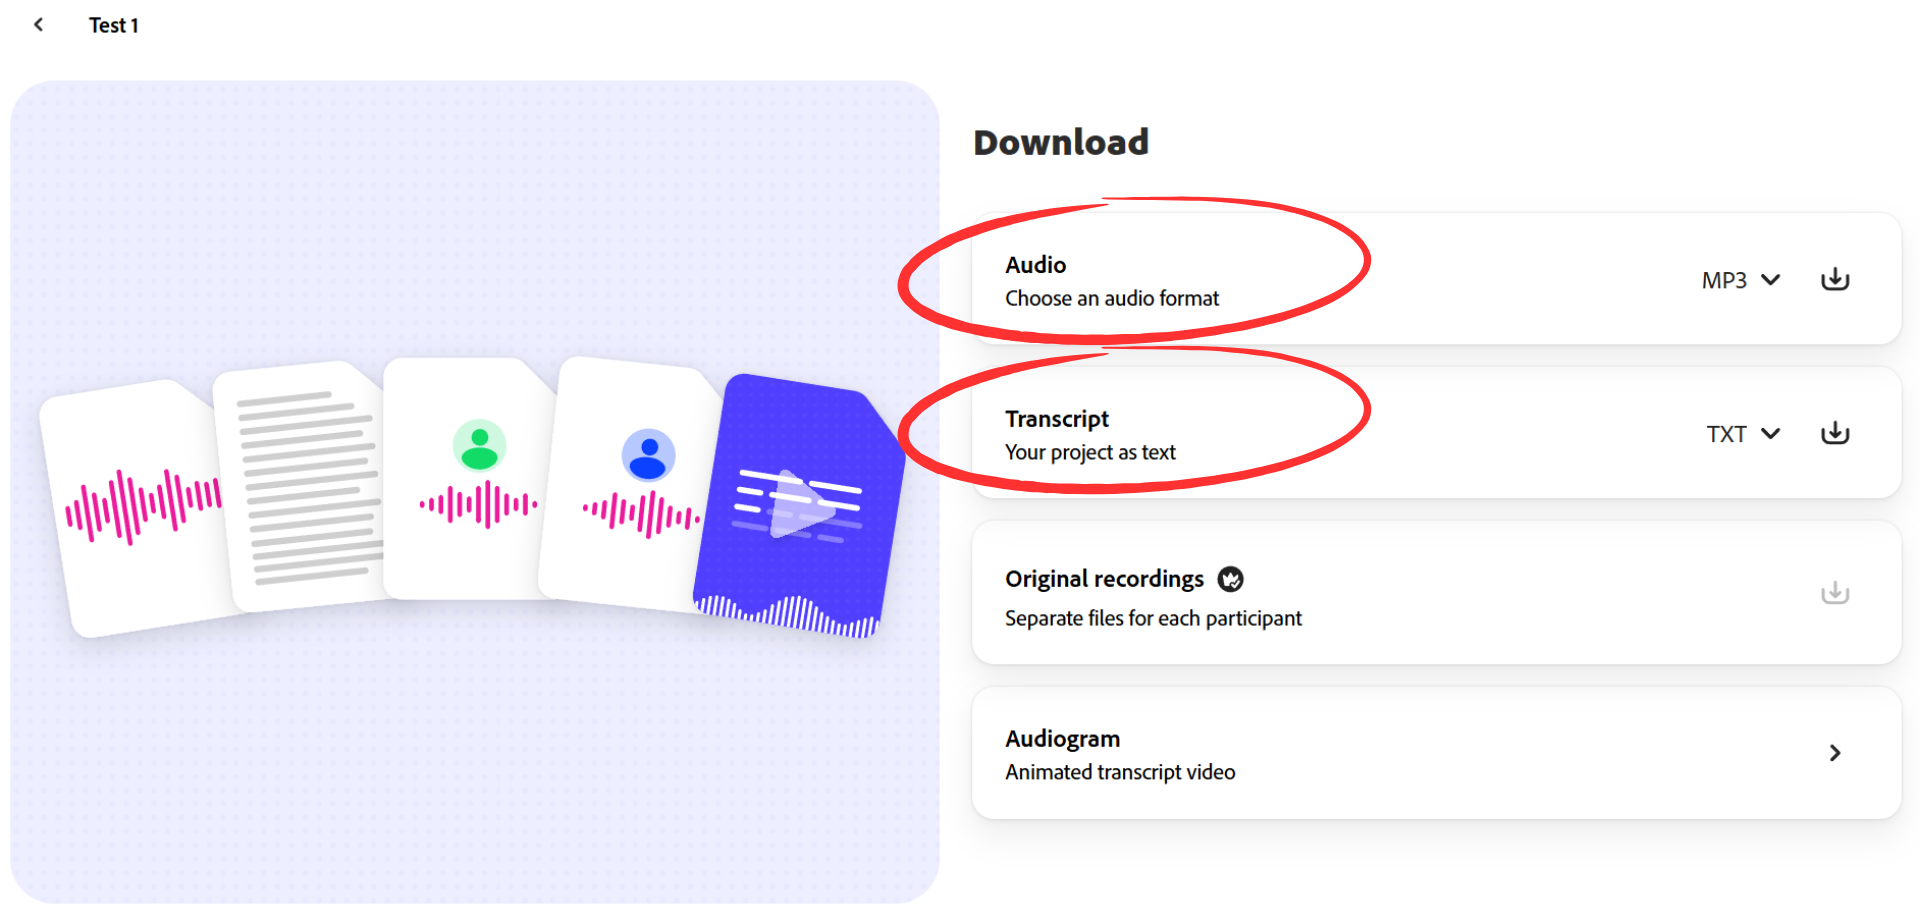
- Click ‘Download’ and choose MP3.
- Download the transcript as a text file or Word Document to include as an accessible resource.
- Upload the MP3 and transcript to Brightspace or MS OneNote Class Notebook.
- Additionally, you could add a short description, learning outcomes, or reflection prompts.
There are many online resources to support your exploration of Adobe Podcast, including these excellent video tutorials:
Mike Russell: Adobe Podcast for Beginners
Technology for Teachers and Students: The Beginner's Guide to Adobe Podcast
Remember, the best way to learn this tool is through trial and error. Make sure to practice the relevant workflow several times before recording your own voice or inviting a guest to record with you.
Experiment! and enjoy making excellent audio content for learning.
If you would like further help with Adobe Podcast, or if you would like information about using audio for learning content, please reach out to us at DigitalEducation@tudublin.ie