Adobe Express
![]()
Adobe Express is a TU Dublin-licensed, easy-to-use creative tool that allows educators to design visually rich learning materials – and no design experience is required.
Whether you're creating e-books, worksheets, or diagrams, Adobe Express makes it simple to bring your teaching content to life. This quick overview will show you how to get started and highlight some of the best ways to use the tool in your teaching.
You can use Adobe Express to generate the following teaching and learning content:
- Presentations
- Reports
- Infographics
- Worksheets
- Ebooks
- Documents
- Posters
- Academic posters
- Video presentations (with narration)
- Video captions
- Data visualisation
- Tables
- QR codes
- Webpage
- Online portfolio
- Learning journal
- Short character animations
- Mindmaps
Adobe Express works in your browser – no software download is necessary. Simply visit the Adobe Express login landing page and sign in using your TU Dublin credentials. After signing in, you will have full access to Premium and branded elements.

Adobe Express has a highly flexible user interface, which means that the same functions can be accessed in multiple ways. With a bit of practice, you will find the navigation workflow that suits you best. For the moment, you can familiarise yourself with the core functions which are circled in red in the image below.
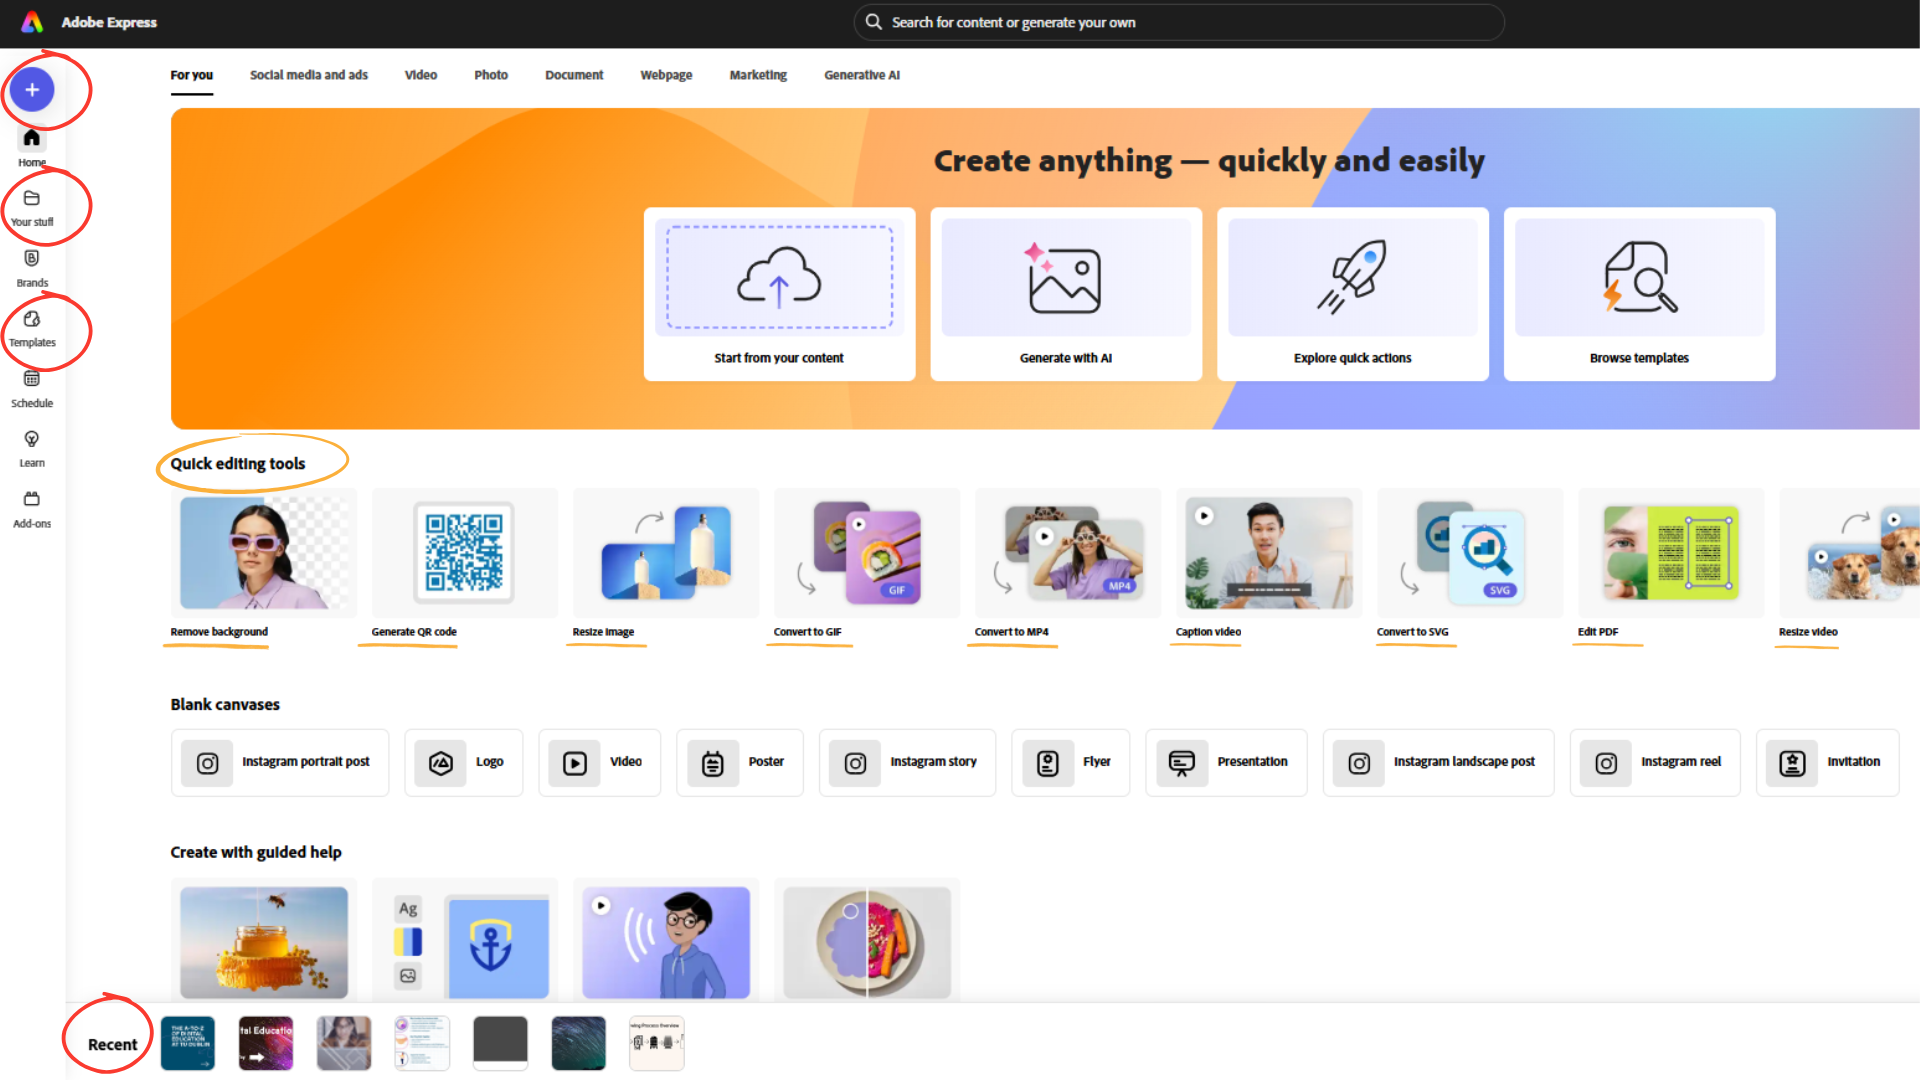
1. The 'Plus Sign’ in the left column allows you to create a project from scratch, with custom dimensions and settings. This is very useful for example if you need an image with very specific dimensions. However, it is recommended to start as a beginner with the use of templates.
2. The ‘Your Stuff’ button in the left column will open a library of your projects and any uploaded files.
3. The ‘Templates’ button in the left column will open a large selection of pre-made assets which you can alter and adjust as much as you like. It is much easier as a beginner to start with a template and amend it.
4. The ‘Recent’ area at the bottom of the page is a convenient way to get quickly to a recent project or to get an overview of your project library.
5. The ‘Quick Editing Tools’ circled in yellow, are for instant fixes and conversions, such as background removal in images, image resizing and conversion to other file formats. These are not projects as such, more a one-stop shop for handy tools.
6. To return to this dashboard from another workspace or at any time, select the Adobe Express icon on the top left of the page.
When you navigate from the main dashboard to the templates menu page, you can use the search bar at the top to browse through the most suitable templates for your design needs. For example, searching for ‘Ebook’ will return many Ebook templates to work with. Keep the price filter set to ‘All’ and search for templates with multiple pages if you will need more than one page in the book.

Basic editing functions are best practiced by using a template and amending it, as opposed to starting a project from scratch with a blank page. Here's how to get started with some basic editing.
1. Open a template and change the name of it in the project name window in the top left of the interface.
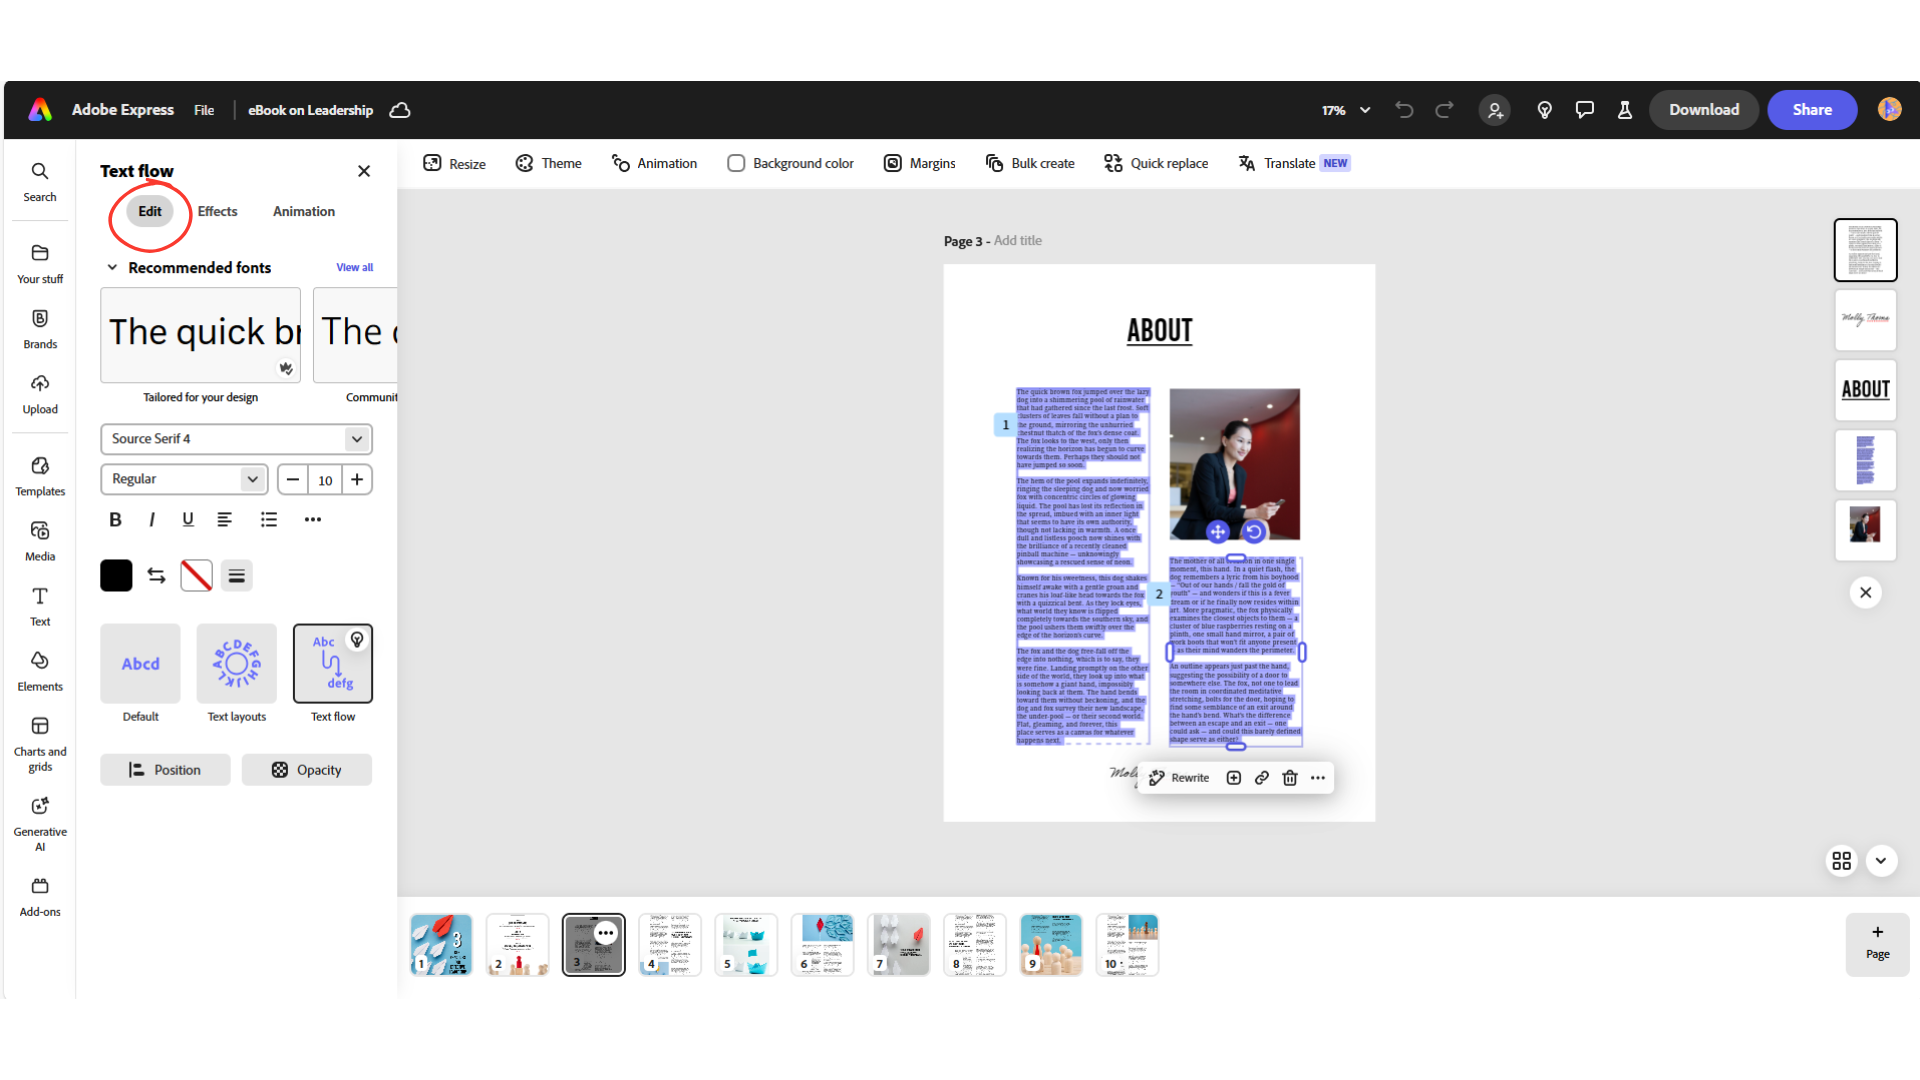
2. Click on a piece of text in the template, and a Text Edit window will open on the left of your screen. Now you can adjust the font type, size, colour, position and many other parameters. Play around with the settings and use CTRL+Z or the ‘Undo’ arrow in the top menu bar to return to the original template settings.
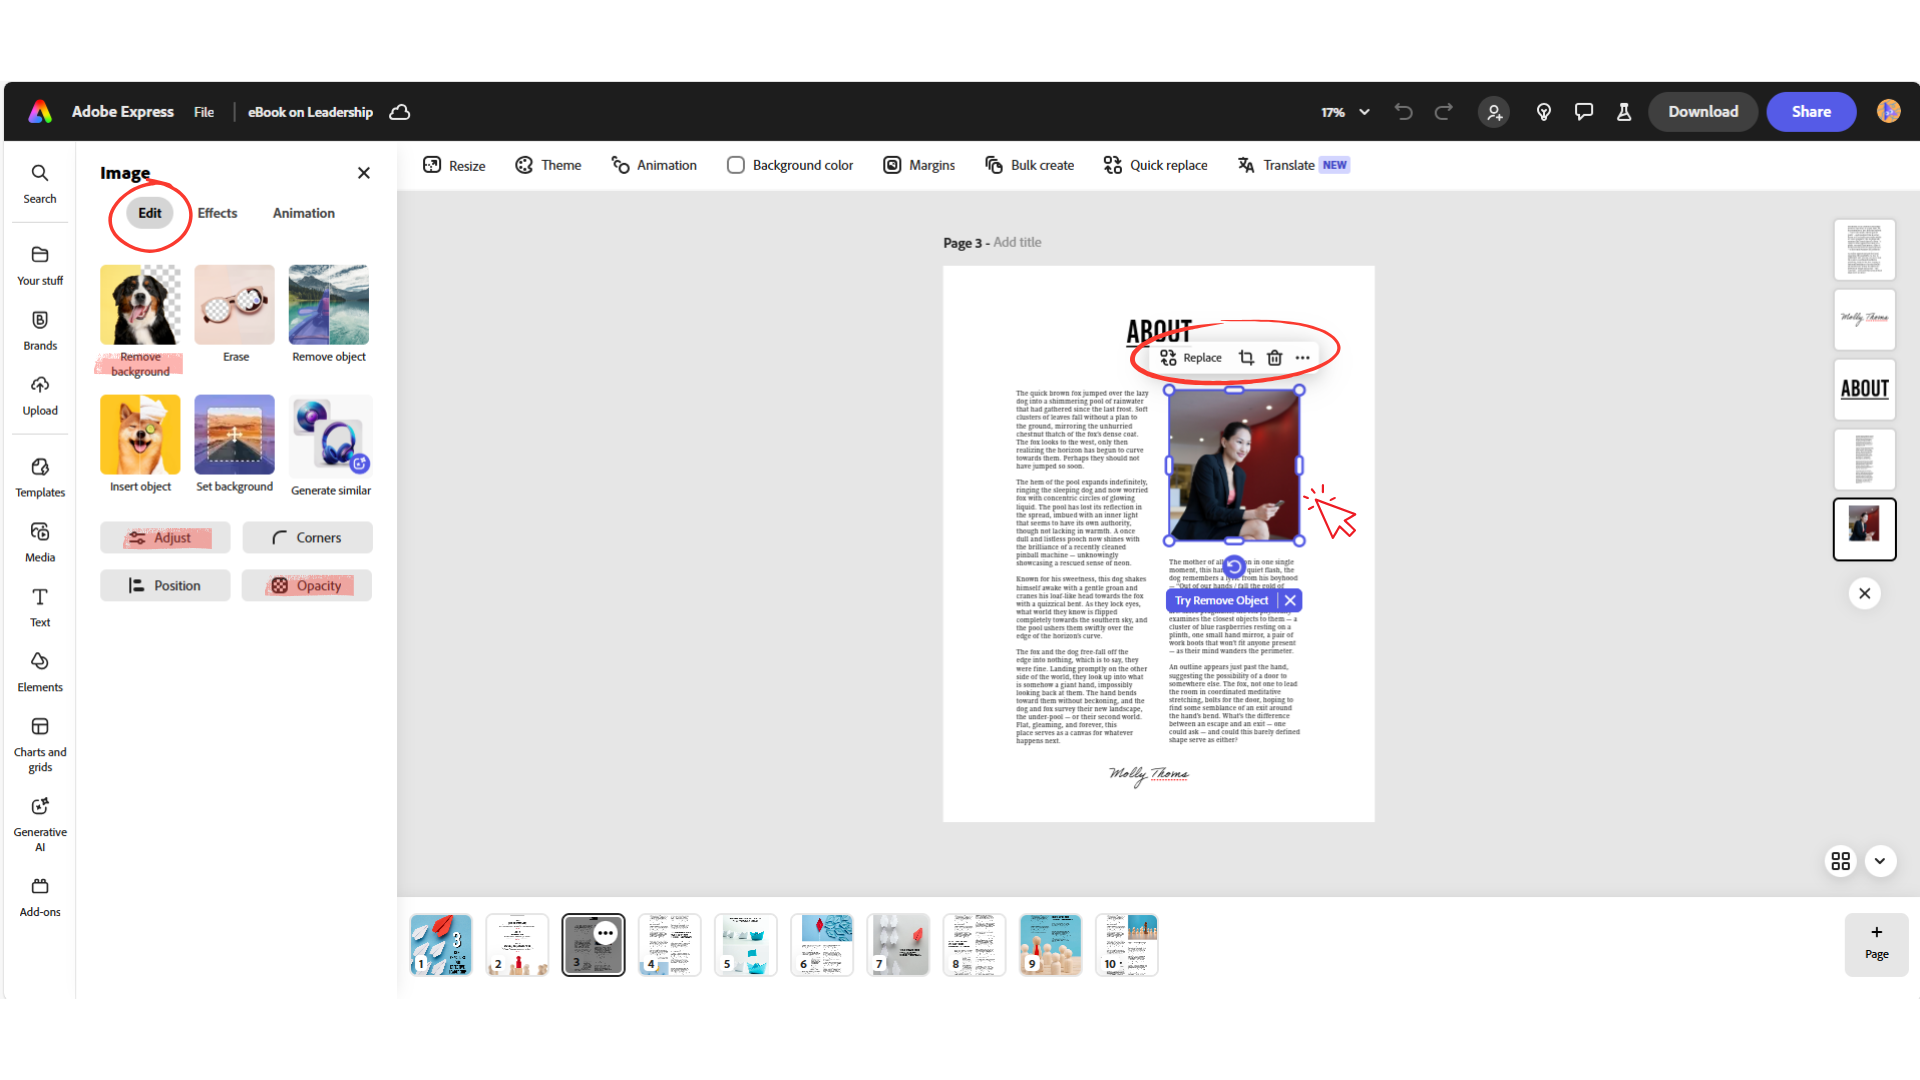
3. Click on an image in the template, and an Image Edit window will open on the left of your screen. Now you can adjust the size of the image and colours, opacity etc. You can remove the background of the image. You can also replace the image from the Adobe library or upload another from your computer.
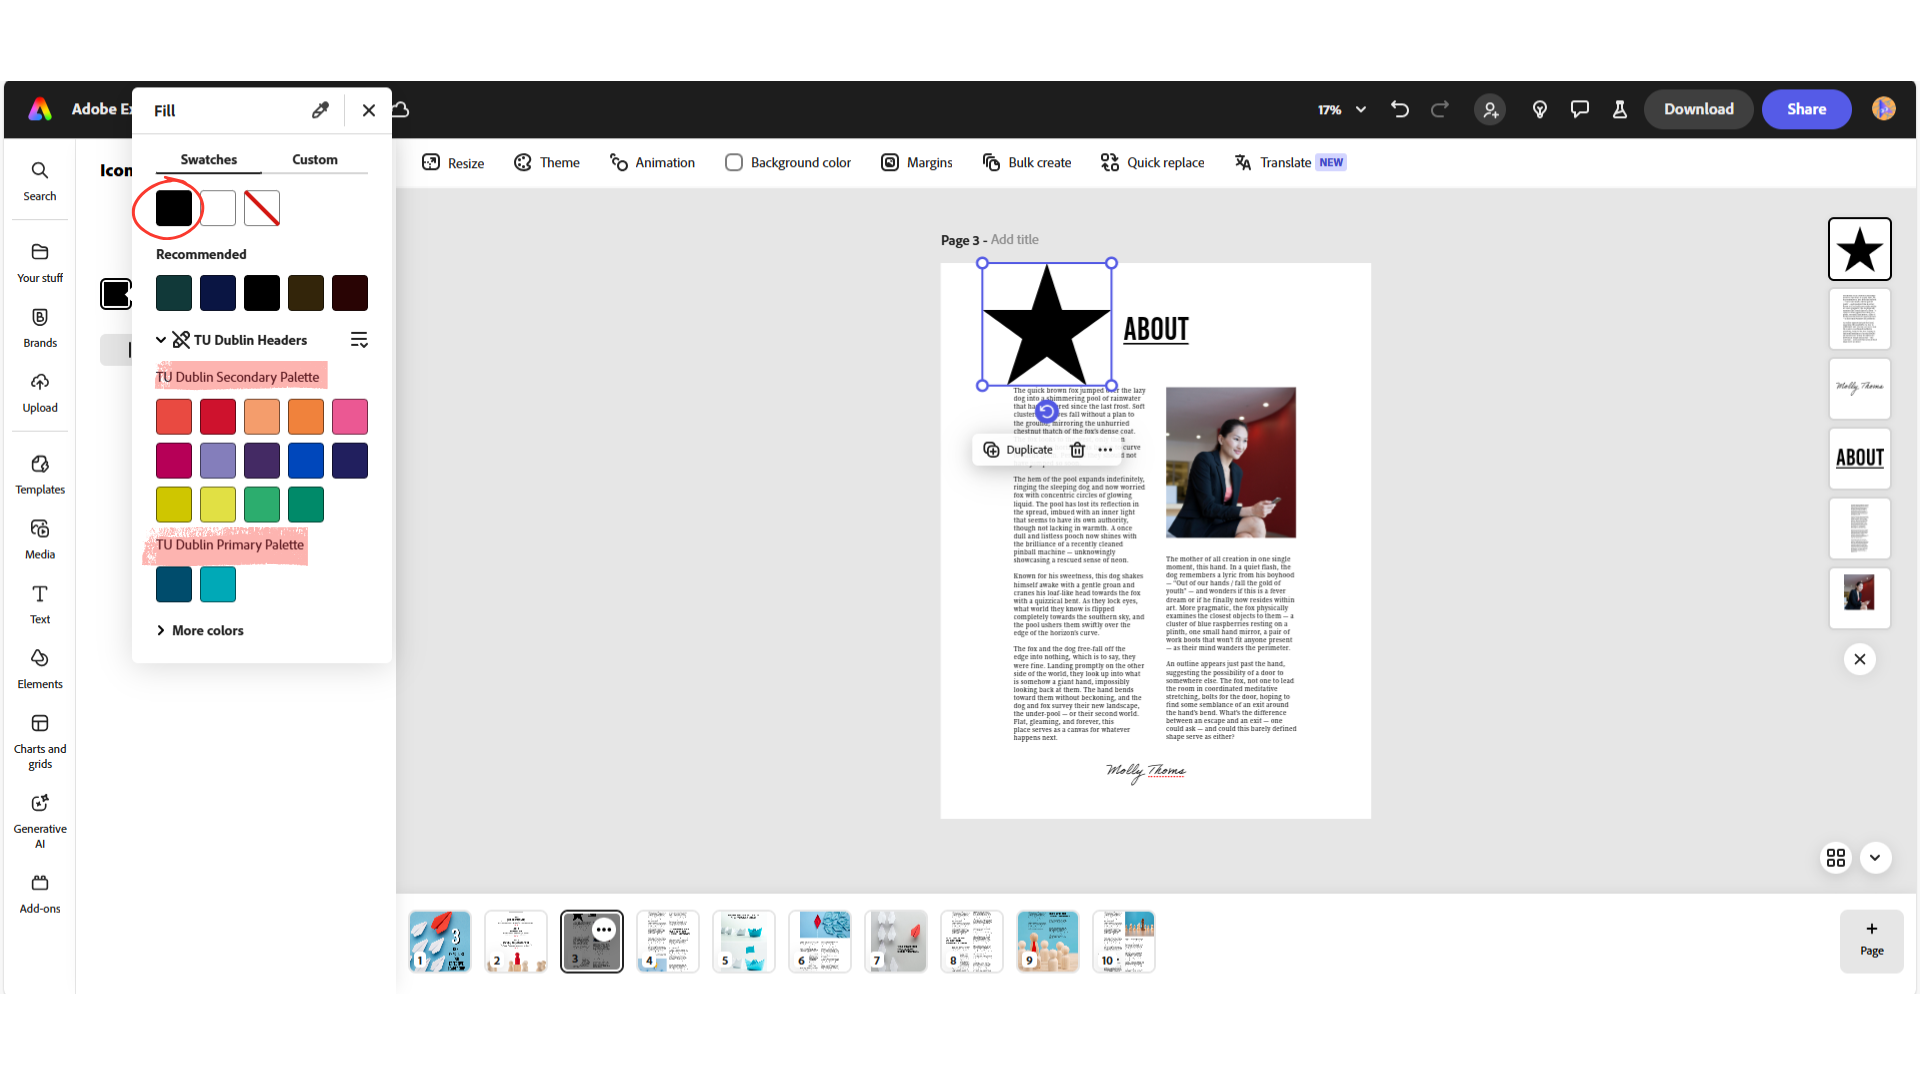
4. To add elements like shapes, icons, graphs or bar charts, select the ‘Elements’ button on the left menu bar. You can then place an element within your page and alter the parameters. You will also see here, as well as elsewhere, that you have access to the TU Dublin branded colours for use in your design.
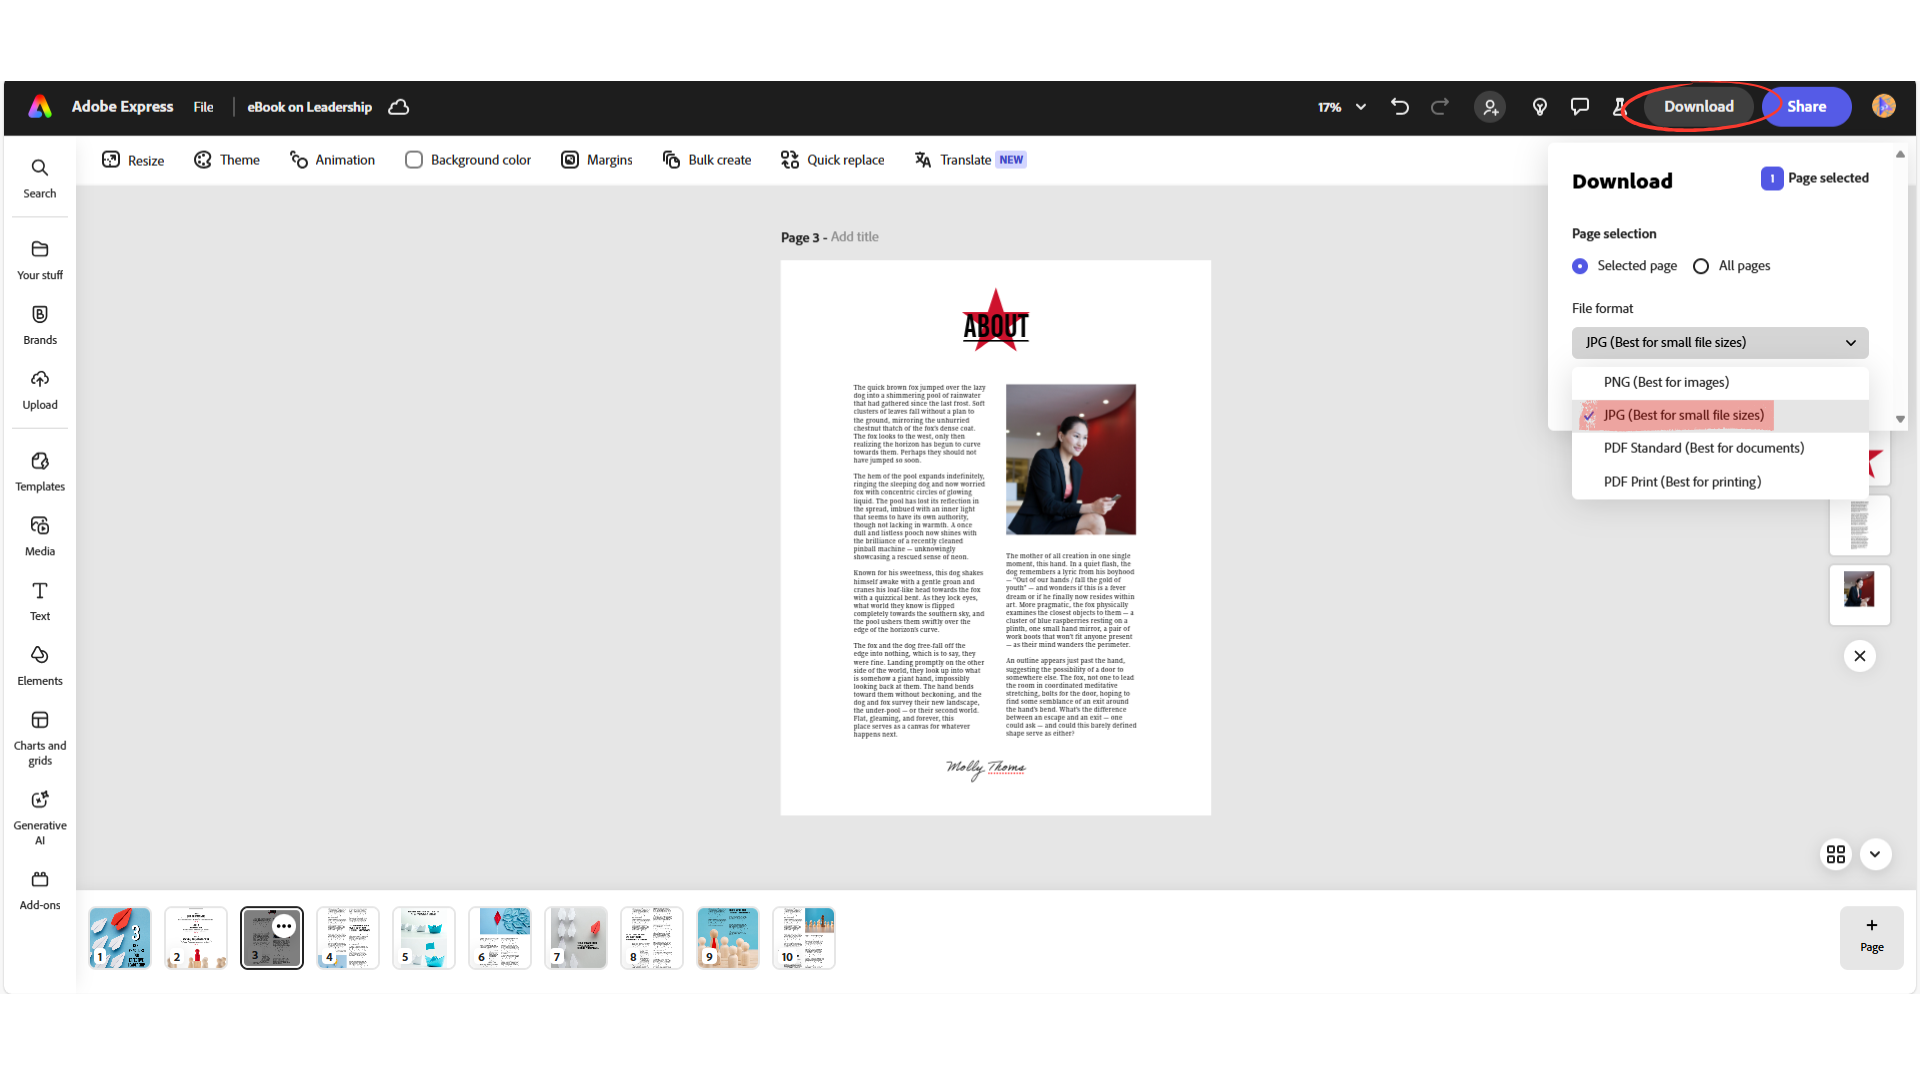
Adobe Express allows you to distribute your finished content in a variety of ways, but there are two distinct methods. The first is to use the ‘Download’ function, and the second is to use the ‘Share’ function.
1. Selecting ‘Download’ in the top menu bar will open the ‘Download’ window. From here you can select the most appropriate file format for distribution of your content. If you are downloading an image that will be distributed digitally, a JPG download should suffice. This will generate a smaller file size if you would like for example to avoid overloading the VLE with large images.
If you definitely require a higher resolution image, you should download a PNG.
If you need to professionally print your image (an academic poster for example) select PDF Print as the download option.
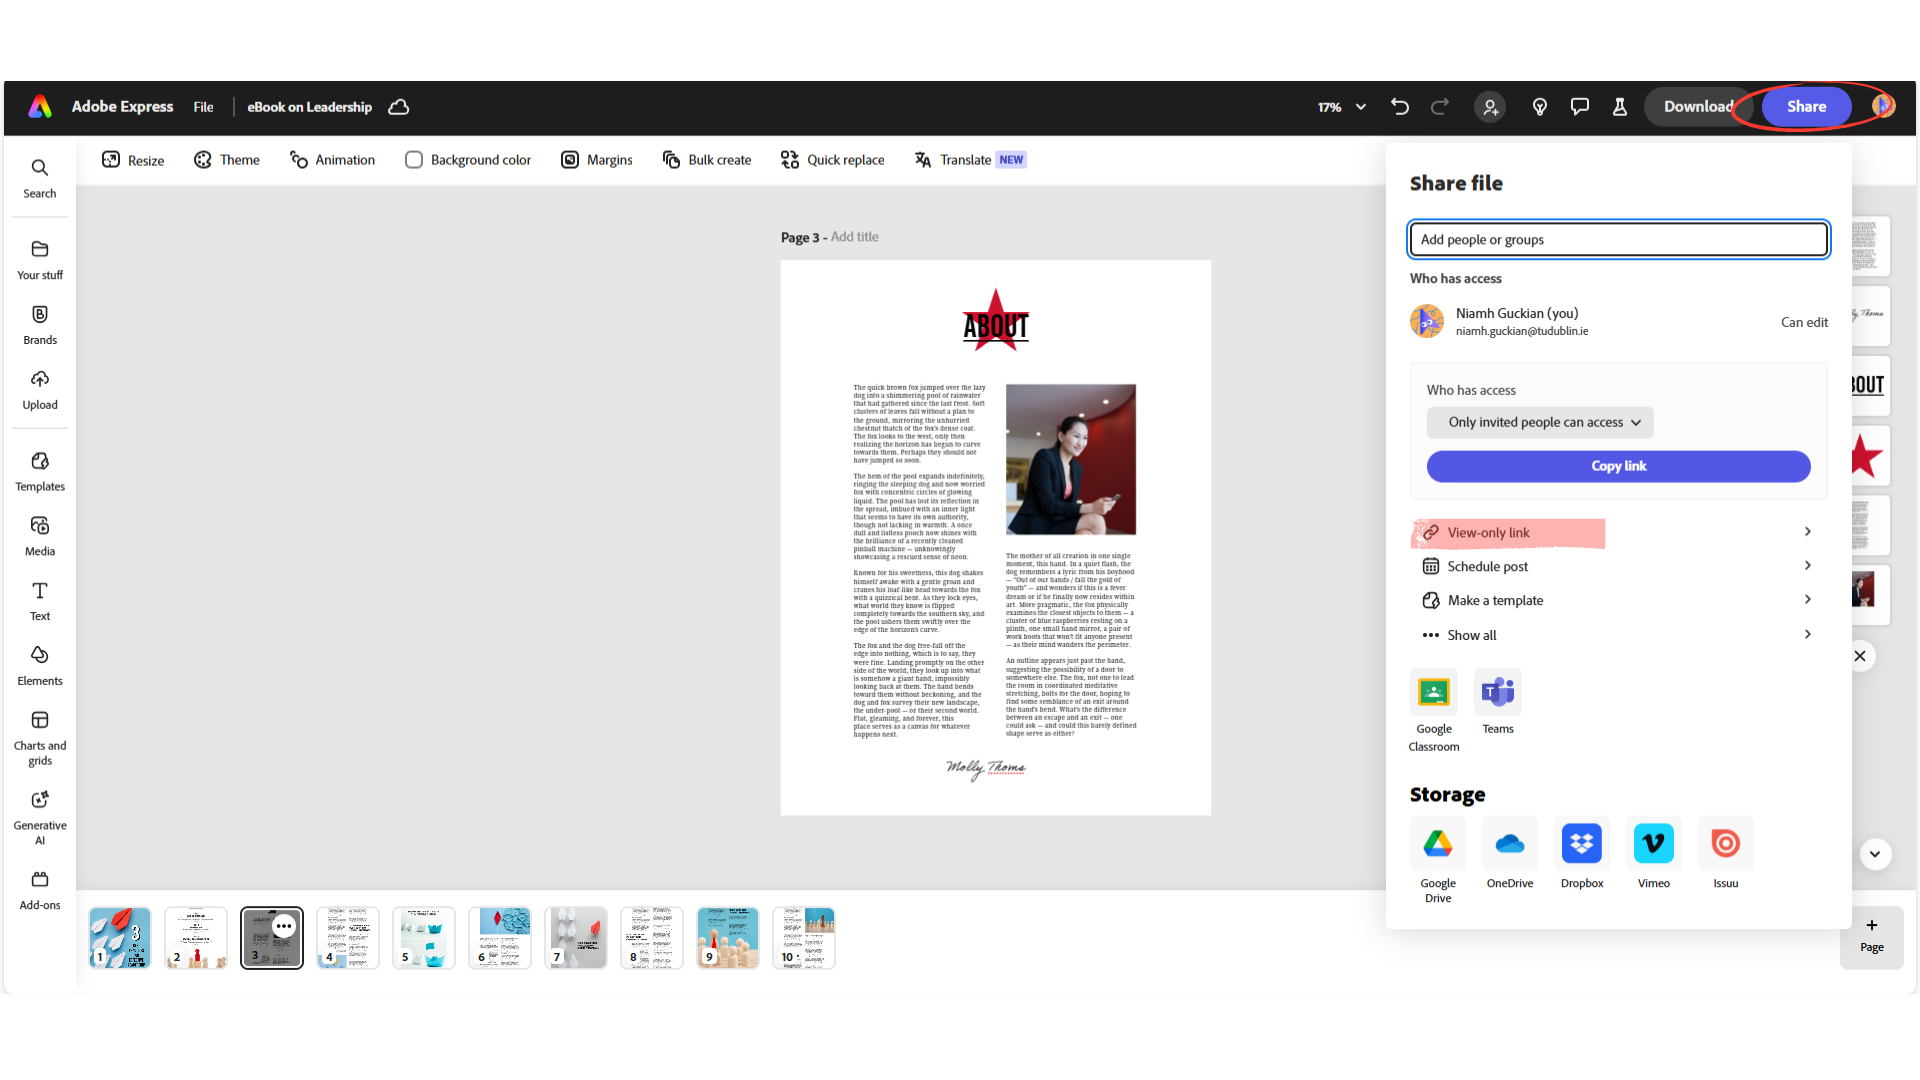
2. Selecting ‘Share’ in the top menu bar will open the ‘Share’ window. This is a useful way to share a template with a colleague for example, or to share a learning asset with students in the VLE without having to download and upload a file. It also means that if you need to edit the learning asset for some reason (an information update or fix) the link will reflect the updated asset – you do not need to generate a new link.
Select ‘View only link’ and you will then be offered more advanced sharing permissions such as ‘Allow others to remix’.
Students at TU Dublin can use Adobe Express in the browser on campus-based shared devices.
Students on approved courses can be given access to Adobe Creative Cloud for personal devices. Find out more about Adobe licenses at TU Dublin here.
If you would like further information about using Adobe Express for learning content, please reach out to us at DigitalEducation@tudublin.ie
You can also attend one of our online training courses introducing the basics of Adobe Express.
For upcoming dates and more details, visit the Academic Affairs Training Calendar.